 One of the vegetables that you can find in some form in most parts of the world is eggplant. I didn’t cook much with eggplant until we started cruising, but now it’s one of my “go to” veggies aboard because of its versatility. Below are three of my favorite eggplant recipes. Hope you enjoy!
Italian Caponata
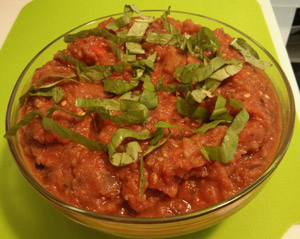
Finished eggplant caponata garnished with fresh basil.
This easy recipe makes a great dip or spread, and also can be used as the filling for a wonderful vegetarian sandwich!
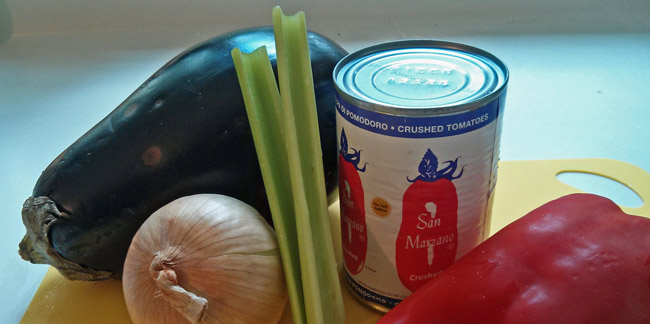
Ingredients:
- 1/4 cup olive oil
- 1 stalk celery, chopped
- 1 medium eggplant, cut into 1/2-inch cubes
- 1 medium onion, chopped
- 1 bell pepper, cut into 1/2-inch pieces (I prefer red or yellow)
- 1 can diced tomatoes
- 3 tablespoons raisins (optional)
- 1/2 teaspoon dried oregano
- 1/4 cup red wine vinegar
- 4 teaspoons sugar
- 1 tablespoon drained capers (optional)
- 1/2 teaspoon salt, plus more to taste
- 1/2 teaspoon black pepper, plus more to taste
- Fresh basil, shredded, for garnish (optional)
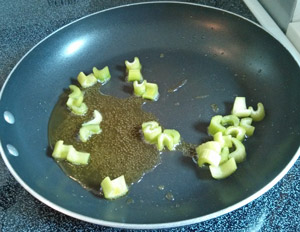
Sauteing celery for caponata.
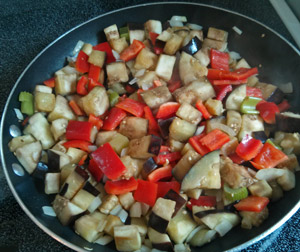
Sauteing vegetables for caponata.
Heat oil in a large skillet, then add the celery and saute until tender, but crisp (about 2 minutes). Add the eggplant and saute another 2 minutes or so, until it begins to soften. Add the onion and saute until translucent, about 3 minutes. Add the bell pepper and cook about 5 minutes. Stir in the diced tomatoes, with their juices, along with the raisins (if using) and oregano. Simmer, stirring often, until the flavors blend and the mixture thickens, about 20 minutes. Add the vinegar, sugar, capers, salt, and pepper. Season to taste (see “Season to Taste — What exactly does that mean“) with additional salt, pepper, and vinegar. Garnish with shredded basil, if desired. Enjoy on crackers, as a dip, or in sandwiches.
Eggplant Dip
This is another great dip or spread using ingredients easily found in most cruising areas.
Ingredients:
- 1 large eggplant
- 1/3 to 1/2 cup mayonnaise
- 2 hard boiled eggs
- 1/4 cup parsley, minced
- 1/2 cup onion, minced
- 2 cloves garlic, minced
- 3 tablespoons olive oil
- 2 tablespoons lemon or lime juice
- Salt and pepper to taste

Eggplant are pierced before roasting.
Pierce the eggplant several times with a fork, then place on a cookie sheet in a 400 degree oven. Bake for approximately 45 minutes until the eggplant is very soft and mushy. If you are in a hot climate and don’t want your oven on for that long, you could instead grill the eggplant over a low flame until soft. Cut the eggplant in half and drain, cut side down, in a colander until almost cool. Scoop out the pulp and puree in a blender or food processor with the remaining ingredients.
Vegetarian Curry
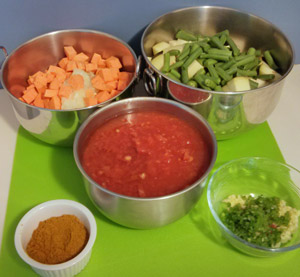
The curry is much easier if you prepare all of your ingredients before starting to cook.
Don’t be intimidated by the list of ingredients. I’ve found that I can leave out or substitute ingredients that aren’t readily available in my cruising area. The resulting curry is delicious. The recipe makes a large amount, so you can serve a crowd or have lots of tasty leftovers.
Ingredients:
- 2 tablespoons curry powder
- 1 1/2 teaspoons garam masala (optional, or use additional curry powder)
- 1/4 cup vegetable oil
- 2 medium onions, finely chopped
- 1 medium sweet potato, peeled and diced in 1/2-inch pieces
- 3 cloves garlic, minced
- 1 tablespoon minced fresh ginger (or substitute about 1 teaspoon dried ginger)
- 1 serrano or jalapeno chile (seeds and ribs removed if you’d like a milder curry)
- 1 tablespoon tomato paste
- 1 1/2 cup green beans, cut into 1-inch pieces (optional)
- 1 medium eggplant, cut into 1/2-inch pieces (I don’t bother to peel it)
- 1 can diced tomatoes
- 1 1/4 cups water
- 1 can chickpeas, drained and rinsed
- 1/4 cup heavy cream or coconut milk
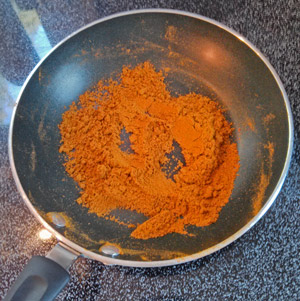
Toasting ground spices to enhance flavor.
Toast the curry powder and garam masala (if using) in a small skillet, stirring constantly, until spices become fragrant and darken slightly. Set aside.
Heat 3 tablespoons oil in a large Dutch oven over medium-high heat. Once the oil is shimmering, add the onions and sweet potato. Cook, stirring occasionally, about 10 minutes or until the onions are caramelized and the potatoes are slightly browned on the edges.
Reduce heat to medium. Clear the center of the pan and add the remaining tablespoon of oil along with the garlic, ginger, chile, and tomato paste. Cook, stirring constantly, about 30 seconds or until fragrant. Add the toasted spices and cook about 1 minute longer. Add the green beans (if using) and eggplant and cook (stirring constantly) until the spices coat the vegetables, about 2 minutes.
Add tomatoes, water, chickpeas, and 1 teaspoon salt. Increase heat and bring mixture to a boil, scraping the bottom of the pan to loosen the browned bits. Cover, reduce heat to medium, and simmer until vegetables are tender, about 10 to 15 minutes. Stir in cream or coconut milk and continue to cook until heated through. Adjust seasoning and serve over rice. If you like, serve with traditional curry condiments, such as yogurt, chutney, or relish.

 Just a quick note to post my banana bread recipe, in response to a discussion on the Women Who Sail (WWS) site. Thanks for your request, Linda!