
 Okay, this is a cheese that any cruiser or home cook can make! No special ingredients, equipment, or techniques are required. The only things needed to make ricotta are milk, acid, and heat. You also need some way to drain the soft cheese, such as a cheesecloth-lined sieve or colander. If you don’t have any cheesecloth, cut up a clean white tee-shirt to line the sieve. The cloth can be washed and re-used. Some people use coffee filters or paper towels instead. For the acid, you can use vinegar, lemon juice, lime juice, or citric acid (1 teaspoon citric acid mixed in 1/4 cup water).
I am including recipes for two styles of ricotta, one that makes a small quantity of a very rich and creamy ricotta that is great as a spread, and another that makes a larger quantity of standard ricotta which is good for lasagna or calzones.
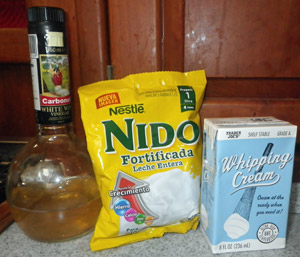
Powdered milk (Nido), heavy cream, and white wine vinegar for the rich ricotta recipe.
Rich Ricotta
- 4 cups whole milk (not ultra-pasteurized)
- 1 cup heavy cream, optional (but makes a nice, creamy spread)
- 1 teaspoon salt
- 3 tablespoons acid (a nice white wine vinegar works well)
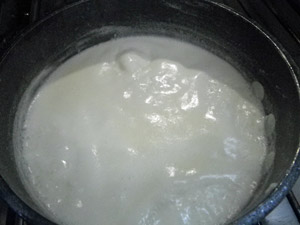
The milk is brought to a rolling boil.
First, line your sieve or colander with cheesecloth or tee-shirt material. Making this aboard the boat, I put 900 ml of water in a medium saucepan and mixed in one 120-gram packet of Nido milk powder. Then I added a one-cup aseptic box of whipping cream (shelf-stable from Trader Joe’s) and the salt. Heat the milk, stirring occasionally, until the milk comes to a full boil. Turn off the heat and stir in the acid. Let stand for about 5 minutes until the milk curdles.
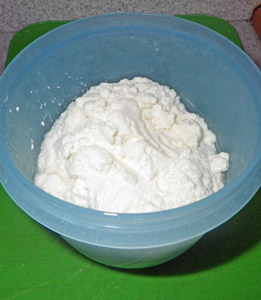
The rich ricotta recipe makes only a small amount.
Pour the curdled milk into the prepared colander and allow to drain for 20 minutes to an hour, until it reaches the desired consistency. Refrigerate in a covered container.
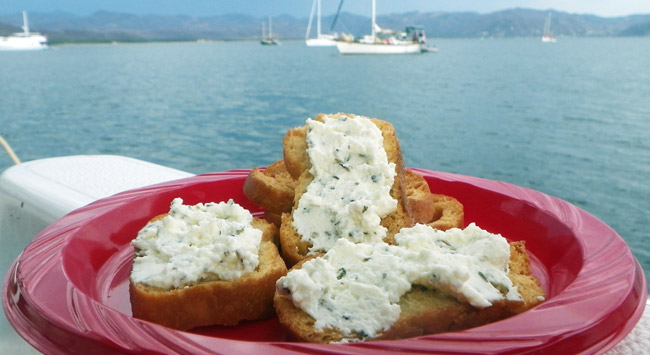
This ricotta is delicious on toast or crackers. For a recent raft-up, I mixed ricotta with a little minced garlic, salt, and herbs. I used basil, rosemary, and thyme, but you could use your favorite herbs. Ricotta also makes a delicious dessert when mixed with a little honey, and maybe some lime juice.
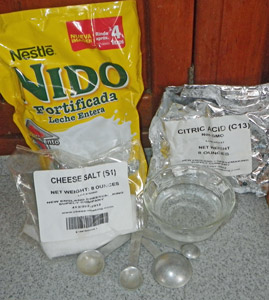
Powdered milk (Nido), cheese salt, and citric acid for standard ricotta.
Standard Ricotta
- 1 gallon whole milk (not ultra-pasteurized)
- 1 teaspoon salt
- 6 tablespoons acid
- 1 – 2 tablespoons heavy cream, optional
Line a large colander or sieve with cheesecloth or tee-shirt material. Mix together the milk and the salt. I used one 4-liter packet of Nido milk powder combined with 3600 ml of water in a large pan. Bring the milk to a full boil, stirring occasionally to prevent scorching. Turn off the heat and stir the acid into the milk. Allow to stand, undisturbed, for about 10 minutes until the milk is fully curdled.

The curds are ladled into a cheesecloth lined colander for draining.
Ladle the curds into the lined colander and drain until the ricotta reaches the desired consistency. If you wish, reserve the whey remaining in the pan for other purposes, such as Whey Pizza Dough (see below). If you’d like the ricotta a little creamier, add a couple of tablespoons of heavy cream and mix thoroughly. The ricotta can be stored, covered, in the fridge for 1 – 2 weeks, and it is wonderful for lasagna or calzones.
I used this ricotta to make delicious calzones, using the following recipe which was adapted from one in Ricki Carroll’s “Home Cheese Making” book.
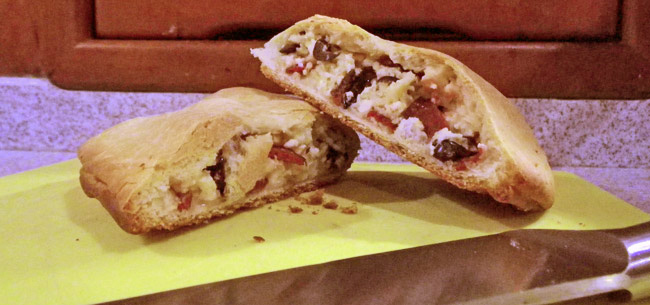 Pepperoni and Olive Calzones
Makes 6
Whey Pizza Dough:
- 3 – 3 ½ cups flour
- 1 tablespoon yeast
- ¾ teaspoon salt
- 1 cup very warm (120 – 130 degrees) whey or milk
- 2 tablespoons olive oil
Filling:
- 1 ½ cups ricotta
- 1 ½ cups grated mozzarella
- ½ cups grated parmesan
- ½ teaspoon salt
- About 2 ounces pepperoni, slivered
- 1 small can sliced black olives, drained
- 1 clove garlic, minced
- ½ teaspoon rosemary
- Olive oil
- Cornmeal
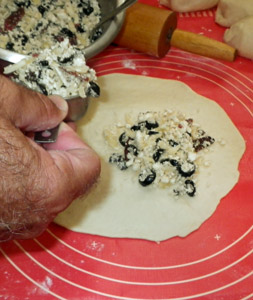
Filling is measured onto the calzone dough rounds before sealing.
Prepare the pizza dough by combining 2 cups of the flour, yeast, and salt in a large bowl. Add the whey (or milk) and olive oil. Add enough of the remaining flour to make a soft dough. Knead on a lightly floured surface until smooth and elastic, 4 – 6 minutes. Cover and let rest on a floured surface for 10 minutes.
While the dough is resting, combine the ricotta, mozzarella, parmesan, salt, pepperoni, olives, garlic, and rosemary in a medium bowl.
Divide the dough into six equal pieces, and roll each piece into a circle about 7 inches in diameter. Place a rounded ½ cup of the filling on one-half of each circle. Fold the dough over the filling and seal the edges by pinching or pressing with a fork.
Lightly oil two cookie sheets, then sprinkle with cornmeal. Place three calzones on each pan. Make three slits across the top of each calzone with a sharp knife. Brush the tops with olive oil.

Calzone ready for the oven with a light coating of olive oil and slits to vent steam.
Cover and let rise until doubled in size, about 45 minutes. Meanwhile, preheat the oven to 400 degrees. Bake the calzones for about 25 minutes. When they are nicely browned, remove from the oven and brush with additional olive oil. Serve warm.
Note: My oven on the boat will only hold one cookie sheet at a time, so we put one pan of calzones in the fridge to slow down the rising while the first batch baked. The leftover calzones reheated nicely for lunch.