 While chicken is available almost everywhere in the world, in some places it doesn’t come neatly portioned into boneless breasts, or even into bone-in parts. So, assuming you don’t want to roast a whole chicken in your galley stove, what do you do with a whole chicken? With a little practice, you’ll find that it’s quick and easy to break down a chicken into component parts, or even to extract boneless, skinless breasts. Remember to work on a cutting board that’s easy to sanitize. Using the largest board available on your boat will make the process easier. Here’s how to get started:
The basic strategy is to separate the chicken into parts at its joints, rather than trying to cut through any of the heavy bones. You will want to use a good sized knife like a chef’s knife or medium slicer. Too small a knife will make it harder to cut through the joints and to split the keelbone. After you have done this a few times and know where to find the joints you will find you can just contour the knife down and slightly under the body and cut right through the joint in one smooth motion. For now we’ll start with a more detailed description:
| 1. Start by removing the thigh and drumstick: grasp the drumstick, then pull the drumstick and thigh away from the body and feel for the joint. You will probably want to slice the skin apart close to the body and press the thigh down flat to expose the joint. Place the knife onto the joint and change the angle relative to the joint. When the alignment is right you’ll feel the knife start to slice down through the joint. Using moderate pressure, cut through the joint and then the skin below to separate the thigh and leg from the body. | 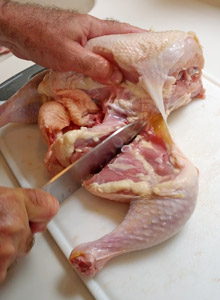 |
| 2. Separate the thigh from the leg: lay the thigh and leg down and flex the joint. Place your knife on the joint and change its angle until you feel it line up. Slice down and through the joint. If you feel a large amount of resistance you probably need to change the angle of the knife to the joint. Although it does take moderate pressure to cut through the joint, when the alignment is right the knife will pass easily through the joint. | 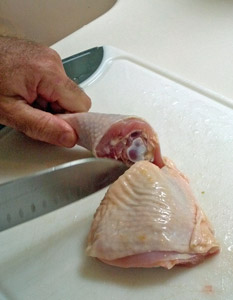 |
| 3. Next remove the wings: grasp the wing and pull it out from the side of the body to locate the joint. Slice the skin so you can see the joint. Using the knife,cut through the joint. When you get the alignment right, the knife will slide through the joint easily with only moderate force. After the knife is through the joint, continue the cut through the skin and other tissue to separate the wing from the body. Depending how you are going to use your chicken parts you may want to separate and dispose of the wing tip. Once again, flex the wing tip to locate and open the joint and slice through it. | 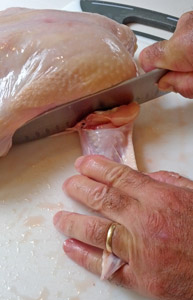 |
| 4. Repeat steps 1-3 on the other side of the bird. | |
| 5. For boneless breasts, remove the meat from the breast: position the body breast side up with the bird perpendicular to you. Slice the skin lengthwise along the ridge of the keelbone. If you want skinless breast go ahead and peel the skin down over the breasts. Working lengthwise along the side of the keelbone, carefully slice the meat away from the underlying structure keeping the knife tight against the bones. It helps to make small cuts while pulling the meat away from the bone until you learn the shape well enough to allow removal of the breast with minimal damage. Turn the bird 180 degrees and repeat with the other breast. Set aside the carcass for stock if you wish. | 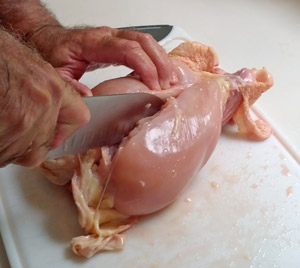 |
| 6. For bone-in breasts, remove the backbone: grasp the backbone and the pointy end of the breast and pull them apart so you can see where the rib cage is. With the knife, slice through the thin ribs on both sides of the body towards the wide end of the breast. Grasp the back bone and pull it out flat so the skin side of the breast and the back bone are up. Using the knife, slice through the joints connecting the breast to the backbone. Set aside the backbone for stock. | 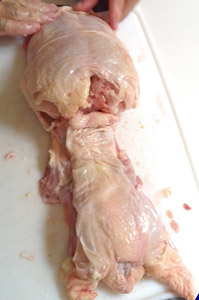 |
| 7.Split the breast: turn the breast skin side down and line the knife up lengthwise with the keelbone (the pale translucent cartilage). Using firm pressure, cut through the keelbone separating the two halves. For many recipes you may want to halve the two breasts into four pieces. Turn them skin side up and segment into two equal portions by slicing through the keelbone crosswise. | 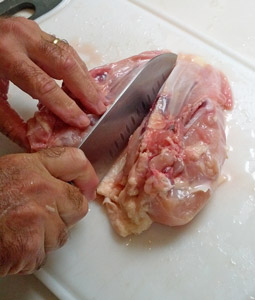 |
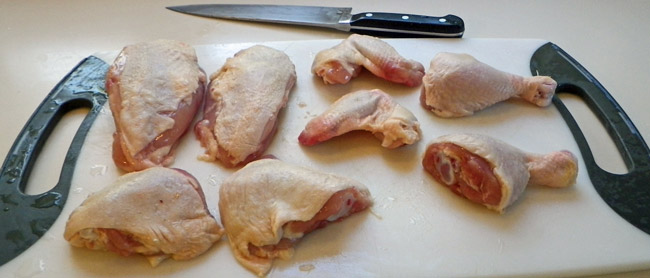
When you are done you will have 8 or 10 pieces of chicken (depending on whether you sectioned the breasts) ready for cooking. When cooking for two we find we can get two meals out of a chicken; breasts one night; thighs, legs, and wings for a second.
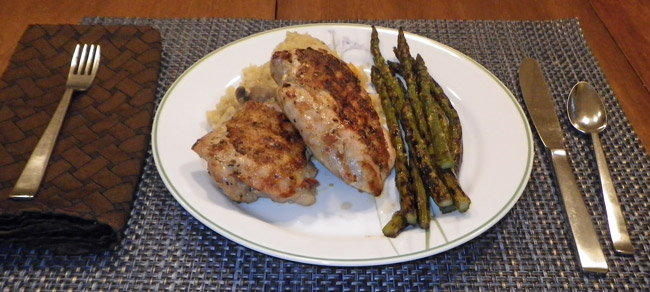
Now that you have your chicken broken down, here’s a nice way to grill bone-in chicken pieces:
Grilled Lemon Chicken:
 This recipe is even better if you brine the chicken before grilling, but feel free to skip this step if you don’t have the time or inclination to mess with brining! To brine the chicken, combine 1 quart of water and 1/4 cup table salt (or 3/8 cup kosher salt) in a gallon zip-lock bag or large bowl. Add the chicken parts and refrigerate for about an hour and a half (or less if that’s all the time you have). Before continuing with the recipe, remove the chicken from the brine, rinse well, dry with paper towels, and season with pepper.
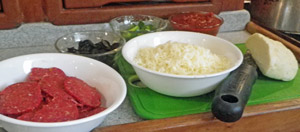
Ingredients:
- 1 whole chicken (about 3 1/2 pounds) cut into parts
- 2 tablespoons olive oil
- 2 large cloves garlic, minced and made into paste
- 1/2 cup lemon or lime juice
- 1 1/2 teaspoons dried thyme
Instructions:
To make garlic paste, finely mince garlic then sprinkle lightly with salt, kosher or coarse grained if possible. Drag the flat side of a chef’s knife back and forth over the mixture until the garlic is reduced to a smooth paste.
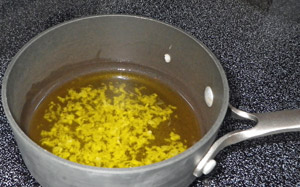
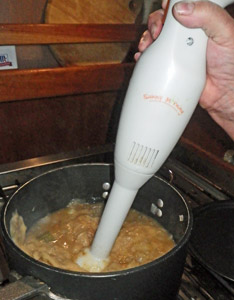
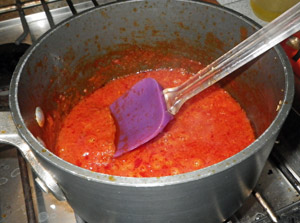
Olive oil and garlic paste are simmered as the base for the lemon sauce.
Heat olive oil and garlic paste in a small saucepan over low heat for a couple of minutes until garlic starts to sizzle, but does not brown. Remove from heat and mix in lemon or lime juice along with the thyme.
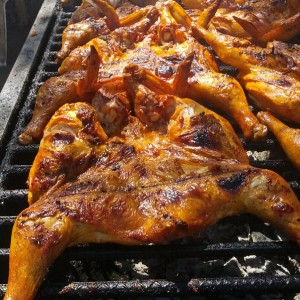
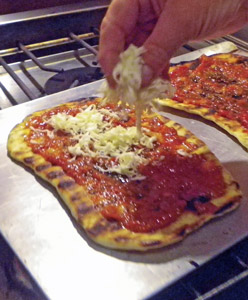
Heat your grill well. Place chicken, skin side down, on the hot grill and cook, turning and moving the pieces as needed to ensure even cooking. Continue cooking until chicken is dark golden brown, about 15 – 17 minutes for legs and wings and 18 – 20 minutes for thighs and breasts. As each piece reaches the dark golden brown stage, remove it to a plate. The chicken will NOT be completely cooked at this point.
Brush each partially cooked piece of chicken with the lemon juice mixture and return to the grill. Heat for about 5 minutes longer, turning each piece and brushing with the lemon once or twice more. When the chicken is done, remove from the grill and brush one more time with the lemon mixture. Serve warm or at room temperature.
Thanks to my favorite skipper, Chris, for sharing his chicken butchery and grilling expertise with us!
Fair winds and following seas,
Heather, The Cruising Cook